Wednesday, December 15, 2010

Week 5. Assignment Due week 6 (January 12, 2011)

While you're away, please shoot 1 roll per week. Whatever you want.   (a total of 4 rolls min)
Try to continue to experiment with proximity, depth of field, shutter time (the longer it is the more movement you will capture) try shooting at night-  or alternative lighting conditions/sources.

The next class will be Jan 12. Please bring in all test strips, prints, contacts, rolls of film (you should have enough time to process and contact print the film you shot while away)

I want 10 good prints, utilize burning and dodging when necessary and filters.

Bring in all notes, film, contacts, TEST STRIPS and previous prints. Make sure to note all camera or enlarger settings, I can't help you, if i don't know what you did. After week 6 class there are only 2 classes left and we need to discuss the exhibition, which we can't have if there aren't tons of prints.

Week 5. Notes

Burning and Dodging

You may produce a print that has good overall exposure and contrast, but there may be areas which are too light or too dark. To lighten an area of the print dodging is used. To darken an area burning is used.

Dodging is selectively holding back exposure to lighten an area of a print. The amount of dodging varies from print to print. After determining the area that requires less exposure find a suitable opaque object (this will range from a circle of card board on a wire to a corner of paper to your hand) to block a portion of the print for some of the overall exposure time.   Whatever is used to block the light should be in motion to prevent hard lines of light being noticeable. 
Burning is selectively adding more exposure to darken an area of a print. The amount of burning varies from print to print. After determining the area that requires more exposure find a suitable form to allow light to pass through onto the desired area of a print. This form should be opaque to block light from the rest of the print. Paper, will allow some light through, while card stock or cardboard, or your hand will not. 
--------------------------------------------------------------------------------------------------------------------------
Alternative Lighting Conditions


Night photography


Just as how daylight photographers pay attention to the position and angle of the sun, night photographers should also pay careful attention to the moon.  A low-laying moon can create long shadows on cross-lit objects, whereas an overhead moon creates harsher, downward shadows.
An additional variable is that the moon can have varying degrees of intensity, depending where it is during its 29.5 day cycle of waxing and waning.  A full moon can be a savior for reducing the required exposure time and allowing for extended depth of field, while a moonless night greatly increases star visibility.  Furthermore, the intensity of the moon can be chosen at a time which provides the ideal balance between artificial light (streetlamps) and moonlight.
Gauging exposure times during a full moon can be tricky; use f/5.6 and 30 seconds at ISO 400 as a starting point (if subject is diffuse and directly lit), then adjust towards scenarios 1-4 accordingly if OK.
full moon
Another factor rarely noticed during daylight is movement of the light source (sun or moon).  The long exposure time required for moonlight photography often means that the moon may have moved significantly over the course of the exposure.  Moon movement softens harsh shadows, however too much movement can create seemingly flat light.

Subject in Moonlight – Static Chart

The following exposures are for f/8 using 400 ISO.
See the dynamic form below for different aperture and film settings. The exposure
times are rough starting points, the subject surface (reflection), ambient light and
other factors will effect your exposure. When in doubt, bracket.
Moon PhaseDays after Full

Full Moon


Gibbous Moon
3-4 days after

Quarter Moon
7 days after

Crescent Moon
10-11 days after

New Moon
14 days after

Note: The moon phases are reflexive, so 3 days after a full moon is the same
as 3 days before a full moon.  Moon Exposure Calculation LINK

Fill with FLASHLIGHTS


Without a sun, you can leave the shutter open fairly long and compose how you want. Try 2 minute exposure at f4 on 200 ISO or 1 min f4 400 ISO.  You will need a tripod. Set up your framing, and use the bulb (B) or time feature (T) on your shutter speeds. Bulb you will need to keep the shutter open manually, time will stay open until you trigger the shutter a second time. (this is recommended for longer exposures). Experiment with painting in subjects. Or using the flashlight to fill in dark areas where you might want detail. This works similarly to burning when printing. Use the flashlight to bring out more detail. 


FIRE (works, spinning, sparklers etc)

6 seconds in duration on 200 ISO at f4 or 6 seconds on 400 ISO at f5.6 for 6 seconds - just enough to light up the people. This is a base line suggestion, if you can meter, do- definitely brackett. Think about the photos you've seen where people write their names or draw pictures with laser pointers.

------------------------------------------------------------------------------------------------------------
Reciprocity Failure
Reciprocity Failure is a problem that occurs with film’s ability to evenly measure light during long exposures. The characteristics of film is that during an exposure it is initially very sensitive to light but as exposure time increases the film’s ability to record light is diminished. So what a light meter may tell you should be a 1-minute exposure, for a particular film that exposure may actually need to be 8-minutes.
here is a link to an HP5 correction chart for long exposures
Black and White films are effective more by the reciprocity failure than color or slide film.
--------------------------------------------------------------------------------------------------------------------------
Solarization
Solarisation is when the image recorded on a negative or on a photographic print is wholly or partially reversed in tone. Dark areas appear light or light areas appear dark. 
Solarization is the process of re-exposing photographic paper during the development process. The result is an eerie silver image which contains light lines between the shadows and the highlighted areas. 

Areas that have been exposed the least are affected the most during the re-exposure of the print. The darker areas or shadows on the prints show little change during the solarization process.
The term is synonymous with the Sabattier Effect when referring to negatives, but is technically incorrect when used to refer to prints
To begin the process, develop and agitate your paper normally. When the image begins to appear, remove the print from the developer and place it into a tray of water for about ten seconds. This will slow the development process.
The next step is to re-expose the paper to light. This exposure should last only about two seconds. The light source should be a low watt bulb, 15 to 20 watt, and should be three to four feet away from the print.

Th

e fi

nal step is to put the paper back into the developer .

A solarized print - ManRay


Tips for gaining maximum results.

  • Using high contrast papers will give you a more dramatic effect.
  • Slow films are easier to work with since they require longer exposure time to develop.
  • Since re-exposure effects the highlights, use a print with a lot of light areas to achieve the most dramatic results

The Sabattier Effect is essentially the same process, but done with the developing film and not the print. Explore at your own risk.

-------------------------------------------------------------------------------------------------------------------------
Paper Negative

There are two ways of using paper negatives.The paper is processed to give a negative, and a final positive print is obtained by contact printing. If you are metering the light set the ISO at anywhere between 4 and 10. You will need to experiment and "bracket". Write down your lighting conditions and exposure times


The paper negative is made by sandwiching the original positive print, emulsion-to-emulsion, with a fresh sheet of paper, and pressing them tightly together under a sheet of heavy glass. You then expose the “sandwich” to the light of the enlarger, just as if you were making a contact sheet from a roll of film negatives.  
A paper negative and the contact print
more info here on paper negatives
--------------------------------------------------------------------------------------------------------------------------
What a colour negative looks like if you process it as black & white & scan it:


Wednesday, December 8, 2010

Week 4 Assignment Due week 5

All work needs to be caught up

Camera settings and enlarger/timer settings should be recorded and stored with your contacts and prints.
This is what you will refer to when printing on your own.

Test Strips are Essential for figuring out the right exposure times! If you use them, you will make better prints.

As a group we need to come up with a theme, Joao suggested "Challenge"
I think we need to define or clairfy that or at least come up with a phrase for a group show.
This is what I want you guys to be thinking and applying to your photographs, so we can curate our work.

Bring to class:

  • printing paper
  • processed negatives (all 4 rolls)- the new roll maybe of whatever you choose keep in mind the theme
  • printed contacts (all 4 contacts)
  • test strips 
  • 7 new prints (with f stop, time, and filter noted on back)

Prints that were due this week will be referenced during crit next week and  while discussing technical issues. BRING THEM!!!
2 of them should be reprinted (unless we discussed otherwise) using filters to control the contrast and enhance the print quality.
In addition 5 more prints need to be made. These can be any images from any of the 4 assigned rolls, as long as you have not already printed them. I strongly recommend looking at your negatives for density (how much information is on them) and select easy negatives to print. I will send out emails with numbers from your contact sheets of images the class thought were interesting for potential enlargements. You will need to make test strips, and mark your print notes on the backs of each print so we can talk about how to improve our work. You have to use filters for these, even if it is only a #2.

Week 4. Notes

Image composition 

The Rule of Thirds. fig1
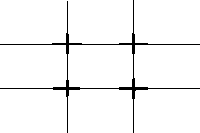
One of the most popular 'rules' in photography is the Rule Of Thirds.  It works like this:
Imaginary lines are drawn dividing the image into thirds both horizontally and vertically. You place important elements of your composition where these lines intersect. 
As well as using the intersections you can arrange areas into bands occupying a third or place things along the imaginary lines. Good places to put things; third of the way up, third of the way in from the left.


The Diagonal Method


The 35 mm photographic frame is a rectangle with a ratio of 2:3. Within this rectangle you can draw two squares that overlap each other.


Using the Rule of Thirds and Diagonal method helps produce nicely balanced pictures.
Once you have got the hang of the Rule of Thirds you may want to break it. This is fine. These 'rules' are best used as guidelines.
Important compositional elements to think about beyond thirds:
  • What lines are being drawn- converging or dissecting? 
  • Diagonal lines can also be utilized in a similar way or in conjunction with the rule of thirds
  • What basic shapes are being made by your image? Geometric forms can and should be balanced in some way.
  • Light and Shadow- these should be balanced in some way they will make a major impact on the overall composition. 
  • When you slit your eyes before making an image, try to see what basic shapes or shadows are visible.
  • Eye movement is directed around your image by the use of different compositional elements.
Fill the frame.Sometimes your mind tends to exaggerate what you see through the viewfinder of your camera.It is easy to perceive things bigger than they actually are and not to notice 'slight' distractions. Thus ending up with is photographs with areas of wasted space around the edge or elements distracting from the subject in frame. The best way to do this is to move a bit closer. Before you press that shutter release look at the edges of the frame and behind your subject. Make sure that you don't have empty space and check for distractions in the frame. When the three dimensional world is flattened in your image elements can easily crowd or get in the way of one another.
------------------------------------------------------------------------------------------------------------------------------
The Final Print
In evaluating the quality of your print consider these factors:
Brightness
Contrast
Burning and Dodging
Brightness. Print exposure determines the overall brightness of a print. Too much exposure results in a print that is too dark. Too little exposure results in a print that is too light. Once brightness is determined it is time to evaluate contrast.
The left is too flat, the right too dark. To make a decent print from this negative,
assuming this was made with a #2 filter; increase the contrast/ filter grade
from a #2 to a #3 or #3.5 filter. A new test strip would need to be made
to determine the new correct exposure time.
Contrast refers to the difference between highlights and shadows. High contrast prints have mostly dark shadows and light highlights. While low contrast prints are mostly grey with few solid blacks or whites. In general a good print should have both a true black and true white, and a range of grey scale or tones in between. Both extremes of light and dark should retain some detail. Shadow detail is how we refer to the information in the dark areas. If a print has too much white, with no information it is referred to as being hot, or blown out. 
Variable contrast papers produce prints of different contrast when exposed through different filters in the enlarger. There is a scale of filters which traditionally start at #00 and range through #5. 
#2 filter works similarly to printing with white light (no filter), and represents average contrast for the negative and range of paper. Start using this filter as a control, much as you would with f8 for 8 seconds. 
                 As the number decreases from your control filter #2 the contrast decreases, alternatively as the number        
increases the contrast increases. 
# 5 filter increases contrast and produces a print that has more contrast than a print from a non-filtered negative.
A #00 filter reduces contrast and produces a print that is flatter  than a print made from a non-filtered negative(less contrast). 
           * This system works for black and white enlargers, or enlargers without proper colour head filters.

For printing with a colour enlarger handle filtration through CYM channels. We will not be touching the C (Cyan) channel.  Variations of Y (yellow) and M (magenta) work to achieve the same affect as using a set of filters. 
               The yellow channel works to decrease contrast while the magenta channel increases contrast. A control starting point as with a #2 filter:         C 0        Y 0       M 35
To increase contrast as with a filter valued more than #2 increase M.  decrease contrast as with a filter valued less than #2 set M 0 and adjust Y.  
( *insert enlarger scale here *)
When changing contrast with filters of any variety print exposure time will change. 
As the number increases the density of the filter increases, thus resulting in longer exposure times. 
When beginnging a print it is important to start with a #2 filter. Though the filter should not affect your initial contrast, the exposure time will be longer to produce the same print with white light.